How to Keep Video and Audio in Sync During a Noise-Cleanup Workflow
Keep video and audio in sync during cleanup by locking timing, checking the beginning, middle, and end, and verifying the final rendered file.
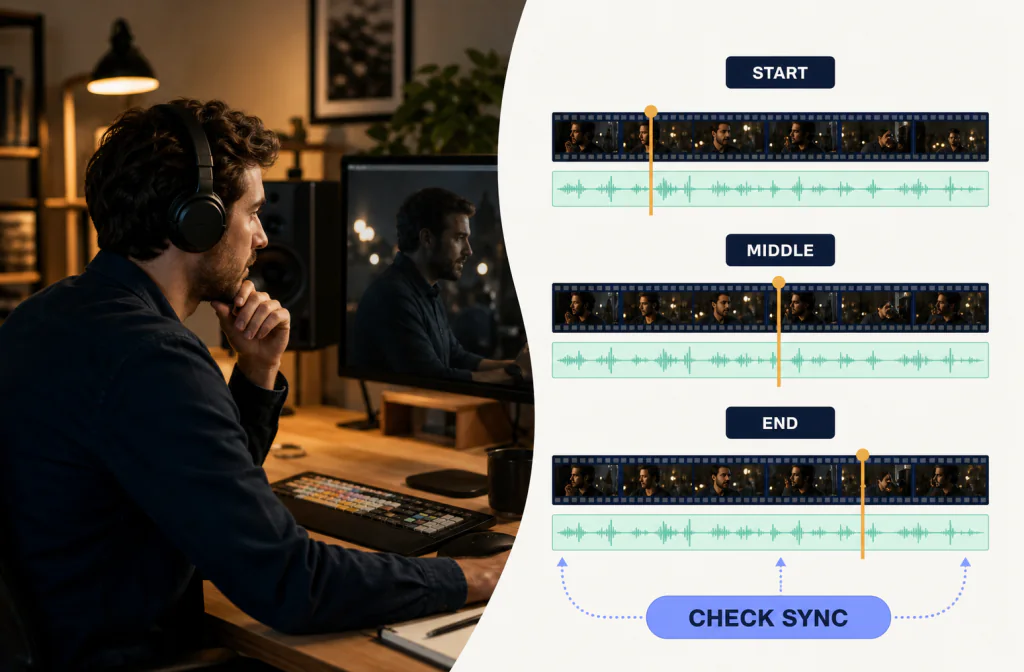
To keep video and audio in sync during cleanup, preserve the original project, export or process from a known start point, keep the replacement audio at the same duration, and verify alignment near the beginning, middle, and end. Use a slate, clap, visible consonant, or hard edit as a reference when available. Do not stretch, trim, normalize, or change frame-rate settings casually during the handoff. Noise Cleaner may be part of the saved-file workflow, but the exact supported video or audio route must be verified before publication.
Treat sound quality and timing as separate acceptance tests. A cleaner track that drifts is not usable, and a perfectly aligned track can still have damaged speech. Preserve the original track until both decisions pass in a rendered file.
Identify the kind of sync problem
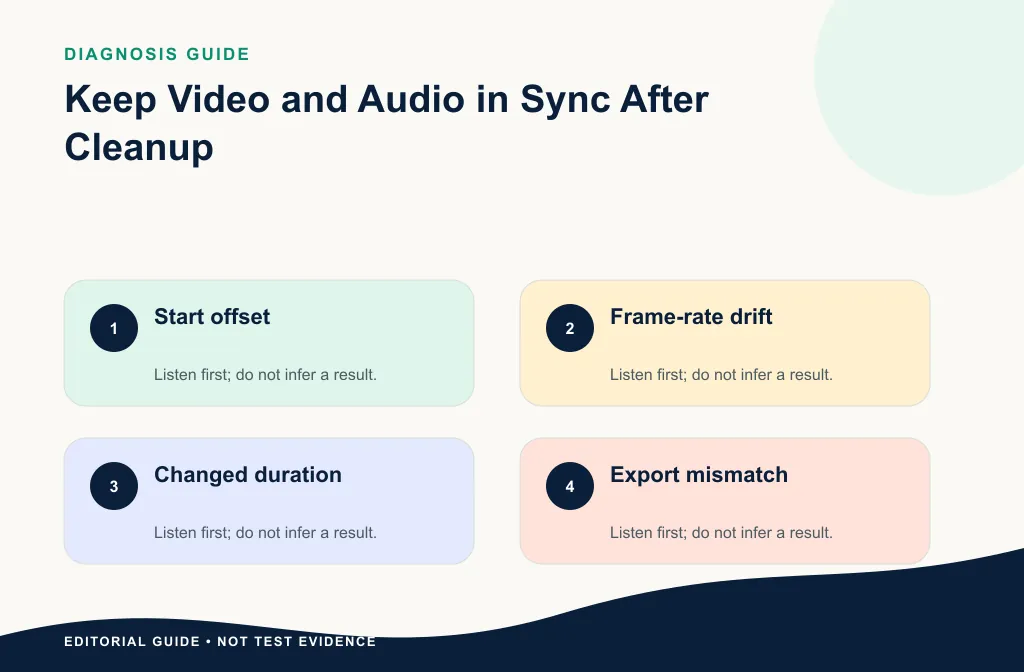
Sync errors are easier to fix when you know how they behave:
- Constant offset: audio is early or late by roughly the same amount throughout.
- Progressive drift: alignment starts correctly and worsens over time.
- Local shift: one edit, replacement, or trimmed section is wrong.
- Playback-only issue: the editor or device stutters, but the exported file is correct.
- Frame-rate or sample-rate mismatch: the handoff changed timing assumptions.
If you are working with an MP4, start with the MP4 audio cleanup checklist. For narrated captures, the screen-recording guide addresses cursor actions, keyboard moments, and lesson timing.
Tell offset, drift, and edit errors apart
Play the same three checkpoints before moving anything. If every checkpoint is late by about the same amount, you probably have an offset. If the first is right and the last is wrong, suspect a duration or timebase problem. If only one scene is wrong, inspect the cut around that scene. If the editor looks wrong but a short render is correct, work on preview performance rather than changing alignment.
| Pattern | Inspect first | Avoid |
|---|---|---|
| Same error everywhere | Import start point and track position | Time-stretching the whole file |
| Error grows over time | Source/output duration and project settings | Fixing only the last scene |
| One section is wrong | A trim, ripple edit, or slip | Shifting every later clip blindly |
| Only preview is wrong | Rendered test outside the editor | Permanent edits based on lag |
| Speech aligns but clicks do not | Mixed sources or replacement boundaries | Assuming one global offset |
Lock the source before cleanup
Duplicate the project and keep the camera or screen-recording original on the timeline. Record the source duration, frame rate, audio sample rate when visible, and exact in-point. If you export audio separately, begin at a known project time and do not remove leading silence unless you also document the offset.
Use clear names such as interview-original.wav, interview-clean-test-01.wav, and interview-approved.wav. Avoid names like final-final-new.wav, which make it easy to replace the wrong track.
If the project uses an external recorder, group or lock the aligned camera and audio sources before export. If you are cleaning one speaker from a multitrack interview, export from the same project start as the other tracks instead of trimming to the first spoken word. Leading silence may be the timing reference that makes reimport predictable.
If the timeline is in Camtasia, use the Camtasia native Noise Removal and export-review guide before changing track length or replacing the source.
For an online Canva design, the Canva Enhance Voice and MP4 sync-review guide keeps the native edit and rendered-file check separate.
For a Filmora project, use the Filmora Audio Denoise and local-export guide before replacing a timeline track or changing timing.
Use three sync checkpoints
Choose one checkpoint near the start, one near the middle, and one near the end. Good checkpoints include a clap, a visible “p” or “b” sound, a keyboard tap shown on screen, or a hard cut with a matching sound. Record the timeline time for each.
Do not rely only on the first ten seconds. Progressive drift can look correct at the start and fail later.
Choose checkpoints that are visible and unambiguous. Closed-lip consonants, hand claps, keyboard taps shown on screen, or a hard door close are easier to judge than long vowels. Record each checkpoint before the handoff, then return to the same moments after reimport. This prevents choosing a convenient point that merely happens to look correct.
Clean without changing timing
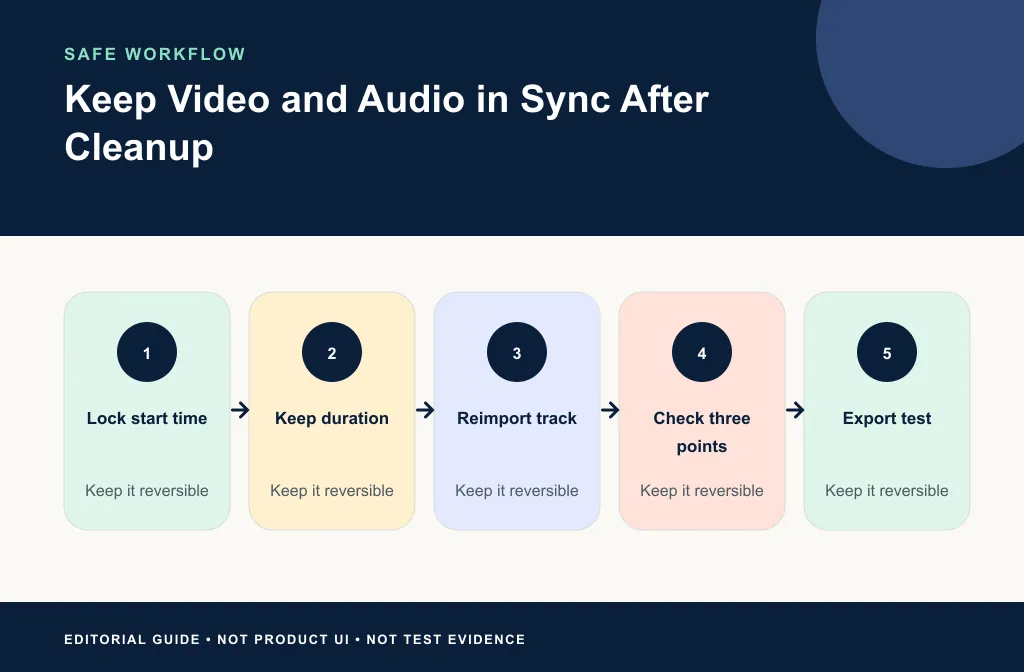
- Export or select the exact source audio range.
- Record its duration before processing.
- Use the verified Noise Cleaner saved-file path without adding unrelated edits.
- Download and compare output duration.
- Reimport to the original start point on a new track.
- Mute the source track but keep it available.
- Check the three sync points and the marked noise passage.
- Export a short test, then play the exported file outside the editor.
Protect duration and channel layout
Do not trim silence, add fades, change speed, or convert mono and stereo casually during the cleanup handoff. Those may be valid edit decisions, but they should happen after the replacement is aligned or be documented. First prove that the cleaned media returns at the expected start and duration.
For a direct video path, compare the returned container's duration and play it outside the browser. For an audio export, confirm that the editor imported the expected sample rate and did not interpret the file at a different speed.
What to do when the track is offset
If the offset is constant, move the replacement track by the measured amount and recheck all three points. If the drift grows, return to the export settings and inspect sample rate, frame rate, and any time-stretch operation. If only one edit is wrong, repair that edit rather than shifting the entire track.
For a talking-head clip, follow the talking-head audio workflow after sync is stable. Premiere Pro users should use the Premiere cleanup and file-handoff guide once its current version steps are verified.
If the offset is constant
Measure it at a clear reference and move the replacement once. Recheck all three points. Do not make several small nudges in different scenes unless the file contains intentional edits.
If the track drifts
Return to source and output durations. Check whether the export began and ended at the same project range, whether a speed change was applied, and whether timing assumptions changed. Avoid stretching by eye until you know why duration differs.
If one scene is wrong
Inspect the edit immediately before it. A ripple deletion, slip, or trimmed leading section may have shifted only that region. Repair the local edit and check the next boundary.
Do not confuse audio quality with sync
A cleaner track can still be unusable if lips and words are misaligned. A perfectly aligned track can still contain distracting noise. Review these as two separate decisions:
- Is the voice cleaner without unacceptable damage?
- Does the replacement align throughout the video?
The Before-and-After review guide covers the first question; this guide owns the second.
Use a similar playback level for the quality decision. A louder replacement may feel clearer, while a delayed replacement is hard to judge because lip mismatch distracts you. Align first, level-match reasonably, then compare the same words for noise, naturalness, and missing detail.
Common causes of drift after a cleanup handoff
- The export did not use the same project start and end.
- Leading silence was removed from the replacement.
- A clip-speed or time-stretch setting remained active.
- The editor interpreted media using different timing assumptions.
- The replacement was aligned to one scene instead of the master timeline.
- A long recording contains segments with different source behavior.
- Playback lag was mistaken for a file-level error.
The right response is to identify the cause, not apply a generic resync effect.
Prevent sync problems
- Keep the same project timebase through export and reimport.
- Avoid trimming leading silence without recording the change.
- Do not overwrite the original track.
- Use a full-duration output check, not only a browser preview.
- Test the final rendered file outside the editor.
- Recheck after any change to playback speed or frame rate.
For an online course video, use lesson start/end references and verify cursor actions. For a webinar recording, include a speaker change and slide transition. For interviews, include a visible consonant from both host and guest when possible.
Limitations and recovery boundaries
Three checkpoints reveal common problems, but they do not replace a full watch-through for critical delivery. A source with dropped frames, variable capture behavior, or pre-existing drift may need specialist repair before cleanup. If replacement duration differs for an unexplained reason, do not force endpoints to match. Return to the source and rebuild the handoff.
Keep the original muted, not deleted, until the final platform upload has been checked. Some platforms transcode media, so preview the uploaded result when the content is important.
Troubleshooting
The waveform starts at the same point, but lips look late
Use a visible consonant rather than waveform shape alone. Confirm that the editor is not adding playback latency, then test a short render outside the editor.
The middle is aligned but the end drifts
Compare source and replacement durations and inspect any speed or sample-rate conversion. Do not shift the end independently before finding the cause.
The cleaned track has a different number of channels
Return to the handoff and verify the input and output. Recreate the export with the intended layout instead of duplicating or discarding channels blindly.
Frequently asked questions
Can a tiny duration change matter?
Yes. A small difference can become visible over a long recording, especially near the end.
Should I replace or mute the original audio?
Mute it until the new track passes review. Keeping it in the project makes comparison and rollback safer.
What if the editor is lagging?
Render a short test and play it outside the editor before changing alignment. The issue may be preview performance rather than the media.
Can I trim the cleaned file before reimporting it?
Only when you preserve the exact offset. Reimporting from the original project start is safer because the timeline position remains obvious.
Should I use automatic synchronization again?
It can be a diagnostic aid when your editor supports it, but verify all three checkpoints. Do not use it to hide an unexplained duration mismatch.
Related guides
- Clean talking-head video audio
- Clean screen-recording audio
- Clean audio in an MP4
- Review audio Before and After cleanup
- Use a Premiere Pro file handoff
Sources and test notes
- Apple QuickTime media-layout documentation explains that timed containers can organize and interleave multiple media streams.
- OBS Filters Guide documents a Render Delay filter for adjusting video timing in OBS; that live-source control is different from repairing a saved-file handoff.
These sources provide container and timing context. They do not establish a sample-specific sync result or a particular Noise Cleaner output behavior.
Final sync-safe decision
Use Noise Cleaner on a copy only after the handoff path is clear. Reimport from a known start, compare duration, check the beginning, middle, and end, and play a rendered test outside the editor. Keep the replacement only when it sounds better and stays aligned. If either test fails, return to the original and fix the source, export range, or local edit before trying again.