How to Compare Audio Before and After Noise Reduction
Compare audio before and after noise reduction fairly. Match the same passage, catch voice artifacts, and decide whether to keep the cleaned file.

Quick Answer
To compare audio before and after noise reduction, play the same words from the same source window at a consistent listening level. First ask whether the unwanted sound is less distracting. Then check whether every word remains clear, the voice still sounds natural, and the downloaded file works from beginning to end. You can use Noise Cleaner to create a cleaned version of a saved recording, but you still make the final editorial decision. The main limitation is simple: quieter does not automatically mean better. A louder output, a cleaner pause, or a smoother-looking waveform can hide damaged consonants, pumping ambience, metallic speech, or words that were already unclear in the source.
Your decision rule: Keep the processed file only when the reduction in noise is worth every change to the wanted voice.
Start With a Fair Comparison
A useful Before-and-After review controls everything that should stay the same. Use the same source recording, start time, end time, words, playback device, and listening volume. The After file must be the actual downloaded result, not a second file that has been manually improved without disclosure.
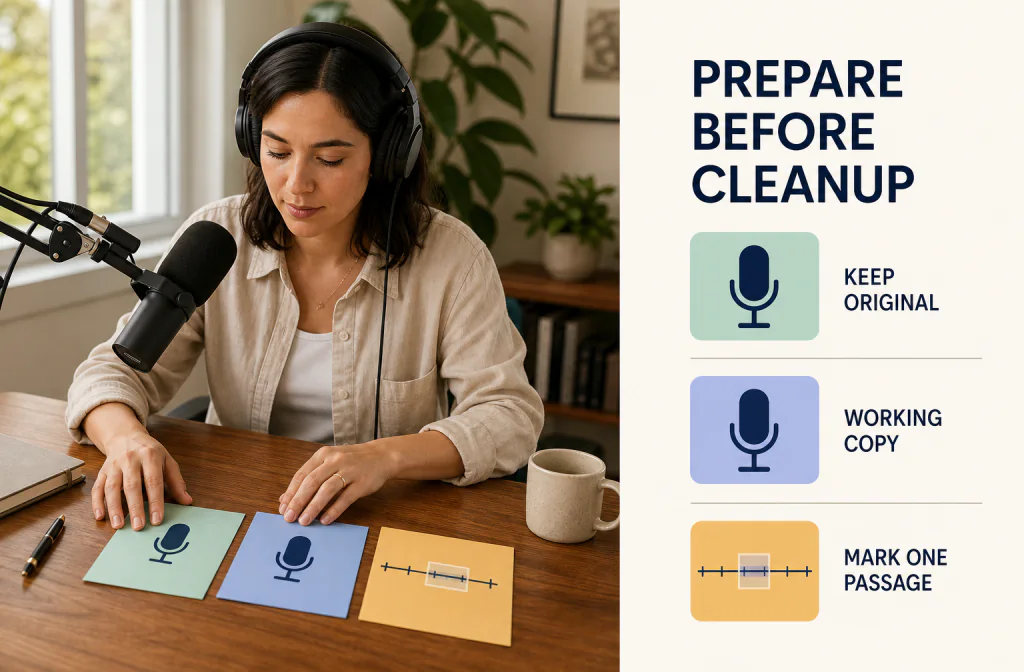
Mark one passage before you process
Choose a short passage that contains three things:
- A complete sentence with normal speech.
- The unwanted sound underneath at least part of that sentence.
- A brief pause where you can hear the background on its own.
A passage of roughly 12 to 15 seconds is usually long enough for a focused first check, but the exact length matters less than using identical content. Write down the start and end time before processing. If the file is important, follow the source-file and listening checklist so your untouched original and working copy stay separate.
Do not choose only a silent gap. Silence can reveal a noise floor, but it cannot tell you whether cleanup preserved speech when the voice and noise occurred together.
Match the listening presentation
Keep the same headphones or speakers and do not change equalization, spatial-audio settings, or device effects between plays. If one version is obviously louder, adjust playback so loudness does not decide the comparison before you listen to speech quality.
If you publish numerical loudness or true-peak values, document the tool, version, measured scope, method, and units. ITU-R BS.1770-5 defines algorithms for programme loudness and true-peak level, while EBU R 128 gives a loudness-normalisation recommendation. Neither standard decides whether a voice sounds natural or whether your audience will prefer the result.
Listen in both orders
Play Before then After, take a short break, and reverse the order. If you can, hide the labels for one pass. This makes it easier to notice when your expectation—rather than the sound—is steering the result.
Practice With a Real Same-Source Pair
The players below use the same rights-cleared indoor podcast recording before and after Noise Cleaner processing. They are provided so you can practise the review method, not as a promise that every microphone, room, voice, or noise pattern will produce the same outcome.
| Test detail | Recorded value |
|---|---|
| Sample ID | indoor-podcast-audio-v1 |
| Source and rights | User-supplied indoor podcast recording |
| Published files | AAC audio in M4A containers, stereo, 48 kHz |
| Comparison length | Approximately 30.38 seconds in each player |
| Processing identity | Noise Cleaner, FullSubNetPlus-b115416; identity recorded in the public sample manifest |
| Verification date | August 15, 2026 |
| Review scope | Same recording and timeline; listen for speech clarity, naturalness, residual noise, new artifacts, and file playback |
Before: play the original first
Listen once without trying to grade every detail. On the second play, follow the words and notice where the indoor background competes with the speaker.
After: switch to the cleaned file
Keep the same device and playback setting. Listen to the background, but give equal attention to consonants, breaths, word endings, and room tone.
Documented editorial observation: In this sample, the indoor background is less prominent in the cleaned version while some natural room character remains. The useful part of this example is the tradeoff you can hear for yourself. It does not establish a universal removal rate, and it does not guarantee the same result for another recording. The main artifact risk is a change to voice texture, consonants, breaths, or ambience, so reject the result if any of those changes make the speech less usable.
You can open the microphone cleanup walkthrough for the recording context, or compare the site's other Before-and-After noise removal examples.
Compare the Result in Five Listening Passes
Trying to hear everything at once makes subtle problems easy to miss. Use five short passes and write down a timestamp when something changes.
Pass 1: Can you understand every word?
Follow the transcript if you have one. Pay attention to quiet syllables, consonants such as “s,” “f,” and “t,” and the ends of phrases. If a word becomes harder to understand, stop and mark that moment. Intelligibility matters more than an unusually quiet background.
Pass 2: Is the target noise less distracting?
Listen during speech and pauses. Describe the change precisely: a constant background may be less noticeable, while an intermittent sound may remain. Do not call the result “noise-free” unless a documented sample actually supports that description.
Pass 3: Does the voice still sound natural?
Listen for metallic, watery, phasey, chirping, robotic, or hollow qualities. Strong processing can make a background quieter while leaving the speaker detached from the room. Audacity's official noise-reduction documentation also warns that stronger reduction can damage wanted audio or create artifacts. That is guidance about Audacity's effect, not evidence about a Noise Cleaner setting, but the listening lesson still applies: judge the preserved voice and the residual noise together (Audacity Manual: Noise Reduction).
Pass 4: Did the ambience or level begin to move?
Pumping can make the background rise and fall around words. Gating can cut the beginning or end of a phrase. A louder After file can conceal both. Replay the marked passage at a consistent presentation level before you decide.
Pass 5: Does the full download pass?
The preview is not your final deliverable. Open the downloaded file independently and check the beginning, the difficult passage, and the end. Confirm that duration and timing still make sense before you return the file to an editor or publishing workflow.
Turn What You Hear Into a Next Step
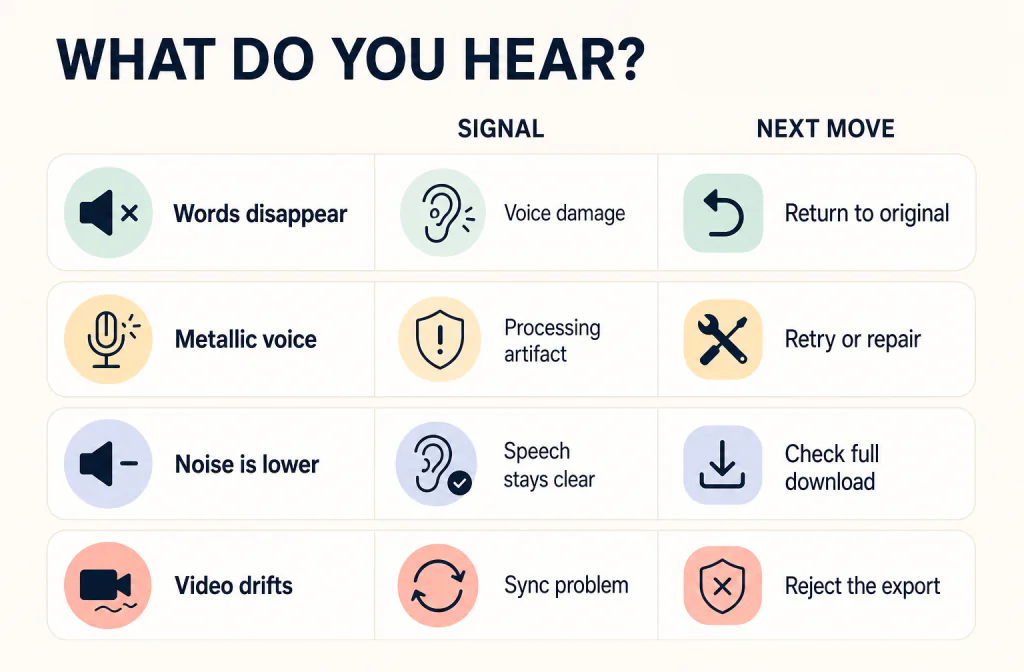
Use a short scorecard instead of inventing a quality percentage:
| Review area | Keep checking | Return to the original |
|---|---|---|
| Word clarity | Every important word remains easy to follow | A word, consonant, or ending is lost |
| Voice tone | The speaker still sounds natural for the project | The voice becomes metallic, watery, robotic, or hollow |
| Residual noise | Some sound remains but no longer prevents use | The unwanted sound still blocks the message |
| New artifacts | No new problem is noticeable in the important passage | Pumping, chirps, cuts, distortion, or distracting ambience appears |
| File integrity | The full download plays and aligns as expected | Content, timing, sync, or playback is wrong |
Add a short note to your decision. “Keep” is not enough. Record what became less distracting, whether every important word survived, what unwanted sound remained, and which artifact risk you checked.
Create the After File Without Losing Your Original
Preserve the source
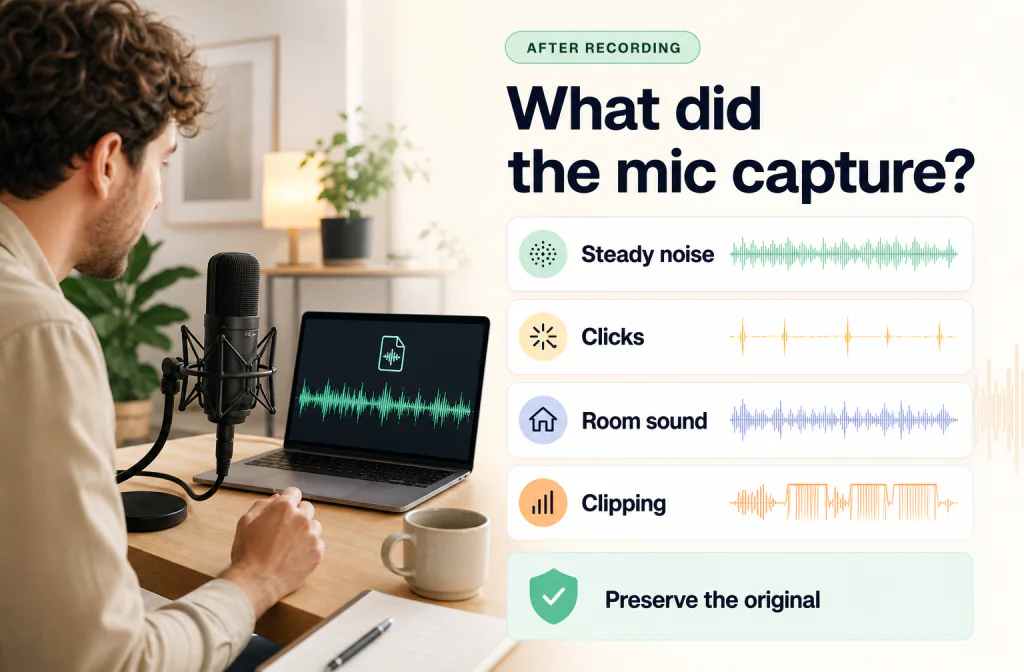
Keep the untouched original and create a clearly named working copy. Record the source, rights, duration, scenario, main noise, and any damage that already exists. Cleanup cannot be blamed for a word that was clipped or masked before processing.
Upload the working copy
Use Noise Cleaner to create a cleaned recording for comparison. Follow the current on-screen validation for your account and file rather than assuming that a general system maximum guarantees acceptance. Do not convert the source repeatedly just to make an upload work; every extra conversion adds another variable.
Let the product create one result
Process the working copy once for the first review. Do not repeatedly clean an already processed export, because stacked processing makes it harder to identify where a voice change began. Noise Cleaner does not present a noise-type detector or an editorial quality score, so describe the noise as your own observation and make the final decision by listening.
Export and verify
Keep the original and cleaned files under different names. Open the cleaned download outside the comparison view, replay your marked passage, then check the full file. If the result is worse, return to the original. Rejecting a processed version is a normal and useful outcome.
For the broader upload-to-download flow, see how to remove background noise from a recording.
If your comparison is between level-based gating and broader saved-file cleanup, use the AI noise reduction versus noise gate guide to match the first test to noise in pauses or noise underneath speech.
Audio and Video Need Different Final Checks
For audio, check playback, the full duration, the marked speech passage, and any channel behaviour that matters to your project.
For video, also check picture-to-sound alignment at the beginning, middle, and end. A cleaned soundtrack can sound good and still be unusable if it drifts from the picture. If you exported audio from an editor, put the cleaned file back at the original start time and verify sync again. Do not assume that matching file duration alone proves frame-accurate alignment.
When the edit is in Camtasia, the native Noise Removal, export, and reimport guide applies this same comparison rule to that editor's documented controls.
The workflow in this article applies to saved files. It is not live filtering for a call, stream, or recording session.
Limitations and Better Alternatives
Noise reduction cannot reconstruct information that the microphone never captured. It cannot guarantee recovery of words buried by clipping, severe distortion, overlapping speech, or extremely loud competing sound. It may also trade background reduction for changes in voice tone or ambience.
Choose another path when it protects the content better:
- Re-record when the take is short, repeatable, and contains missing or badly distorted words.
- Replace one phrase from another take when only a sentence is damaged.
- Use manual editing for a click, impact, or other local problem.
- Use specialist restoration for valuable, irreplaceable material with complex damage.
- Keep some natural ambience when stronger processing harms the voice more than the remaining noise does.
The goal is not silence at any cost. It is a file that stays understandable, natural, correctly timed, and useful for your audience.
Where This Review Method Helps Most
Podcast and interview audio
Check every speaker, not only the loudest voice. A setting that protects one person may change another person's quieter consonants or room tone.
Course and tutorial narration
Compare the same kind of passage across lessons. Consistency can matter more than making one clip exceptionally quiet while neighbouring clips sound different.
Voiceover and client delivery
Keep the original and record your decision note. A client may prefer a small amount of natural ambience to a voice that sounds processed.
Video dialogue
Review sound and sync together. Check the difficult speech moment and three points across the timeline before you publish or hand the file back to an editor.
Frequently Asked Questions
Should Before and After have exactly the same volume?
Use a consistent listening presentation so loudness does not drive the decision. If you adjust playback or normalise copies for evaluation, disclose what you changed and keep the untouched files.
Can a waveform prove that noise was removed?
No. A waveform can help align the same time range or support a documented measurement, but it cannot prove that speech stayed natural, that every word survived, or that a listener prefers the result.
How long should the comparison passage be?
About 12 to 15 seconds is practical for a first check when it contains complete speech, the target noise, and a short pause. Use more than one passage when the noise, speaker, or room changes during the file.
Should I use headphones or speakers?
Use both when practical. Headphones can reveal subtle artifacts; an everyday speaker can show whether speech remains clear in normal listening. Keep the same device and settings within each direct comparison.
What if the noise improves but the voice sounds processed?
Return to the untouched source. Try a different or more local repair path, accept some background sound, or re-record when possible. A quieter file is not useful if the voice loses meaning or naturalness.
Do I need a numerical score?
No. Use categories and notes unless you have a documented measurement method. A clear “keep, review again, or return” decision is more useful than a number with no defined basis.
Sources and Test Notes
- ITU-R BS.1770-5, accessed August 15, 2026 — defines algorithms for programme loudness and true-peak measurement; it does not define subjective voice quality.
- EBU R 128, version 5.0, accessed August 15, 2026 — provides a broadcast loudness-normalisation recommendation; it does not determine whether a cleanup result sounds natural.
- Audacity Manual: Noise Reduction, accessed August 15, 2026 — documents artifact and wanted-signal damage risks for Audacity's own effect; it is not evidence of Noise Cleaner performance.
- Noise Cleaner public sample manifest, verified August 15, 2026 — records the indoor-podcast sample identity, rights status, original and cleaned file hashes, and processing-model identity.
Review this article after a material processing change, a player or source failure, or a change to the product's comparison workflow.
Final Decision: Keep, Return, Repair, or Re-record
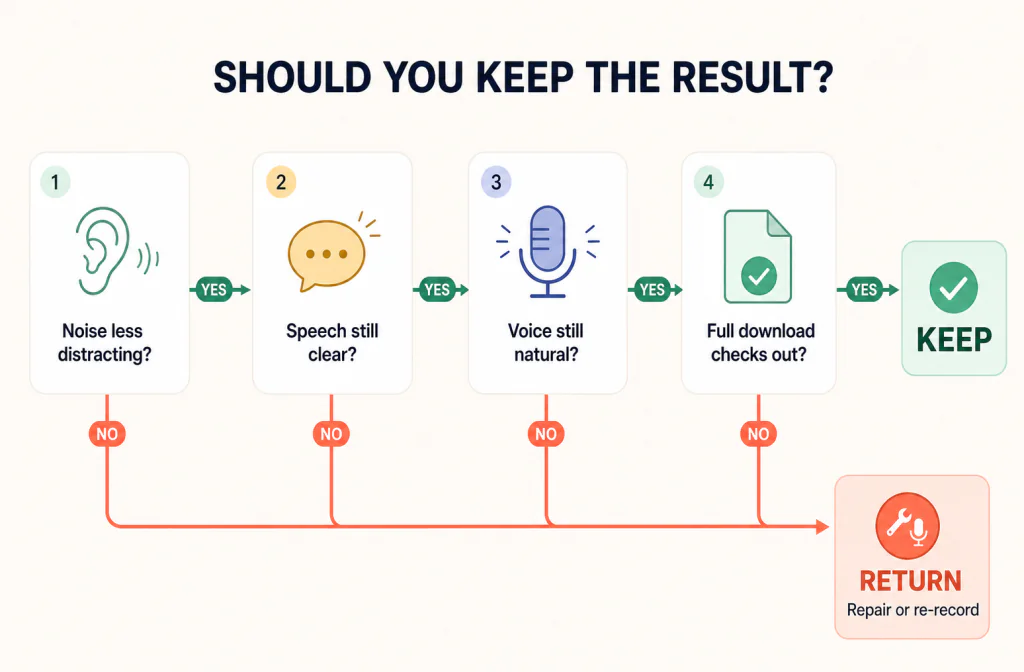
Keep the cleaned file when the unwanted sound is less distracting, every important word remains clear, the speaker still sounds natural, and the full download passes. Return to the original when any of those checks fails. Use manual repair, specialist restoration, or re-recording when that is safer than stronger cleanup.