How to Clean a Microphone Recording After Capture
Clean a saved microphone recording with a review-first workflow, a real Before-and-After example, realistic limits, and safer alternatives.
Quick Answer
To clean a microphone recording after capture, preserve the original, diagnose the unwanted sound, process a working copy, and compare the same spoken passage before and after cleanup. The Noise Cleaner microphone noise remover fits this saved-file workflow: upload the recording, create a cleaned preview, compare it with the source, and keep the result only when the speech remains clear and natural. It is not a real-time microphone filter or a full audio editor. Cleanup may make background noise less distracting, but it cannot reliably recreate words hidden by noise, repair severe clipping, separate overlapping speakers, or guarantee that a heavily processed voice will remain natural.
Decision rule: Keep the cleaned file only when speech remains complete and natural enough for its intended use—not merely because the pauses sound quieter.
First Identify What the Microphone Captured
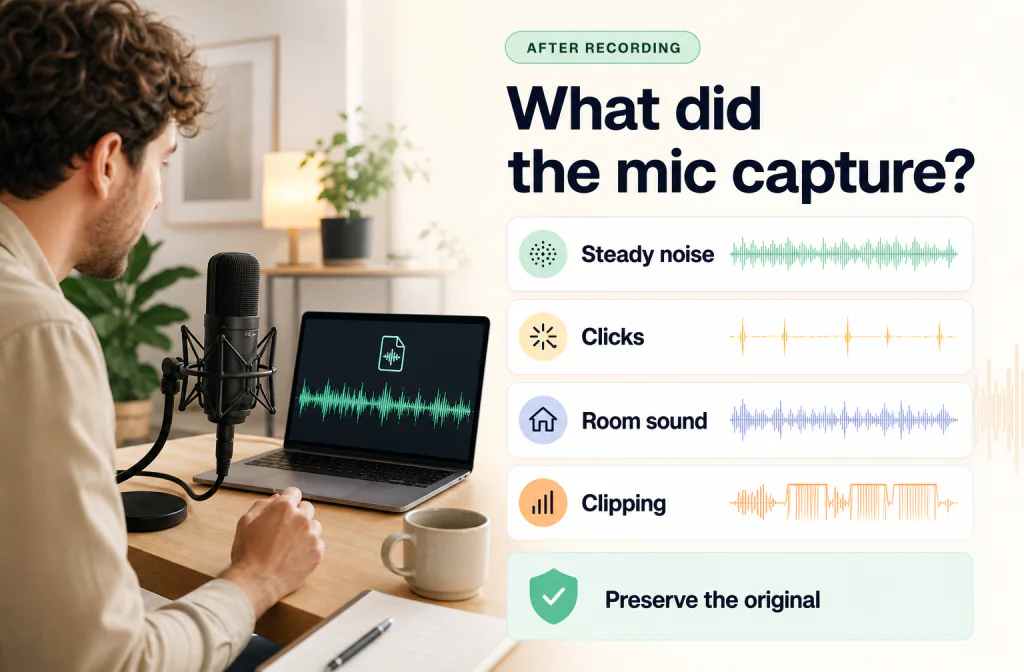
A microphone recording can contain more than one problem. Listen before choosing a repair path, because steady fan noise, keyboard clicks, room reflections, and clipped speech do not behave the same way.
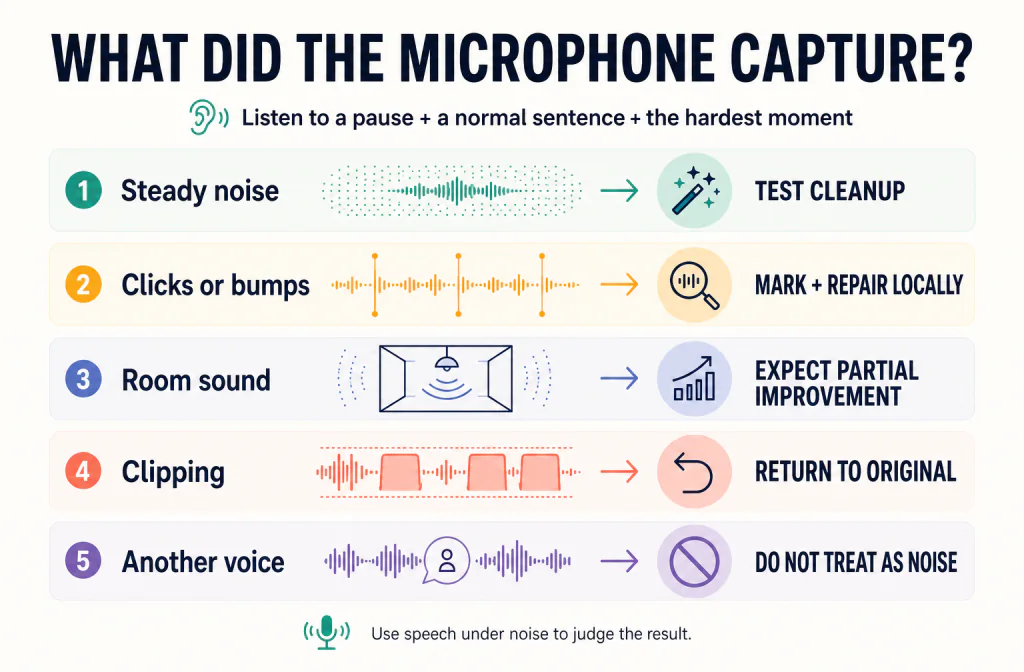
Diagnose the saved recording first, then choose cleanup, local repair, or re-recording.
Check three short places in the untouched file:
- A pause that exposes the background sound.
- A normal sentence with the noise underneath it.
- The hardest moment, such as a loud word, a keyboard hit, or a passing vehicle.
Use the pause to identify the noise, but use speech-under-noise to judge the result. A perfectly quiet gap does not prove that word endings, consonants, breaths, or vocal tone survived processing.
| What you hear | Likely recording problem | Sensible first response |
|---|---|---|
| Constant fan, air conditioner, or broad hiss | Steady background noise | Test cleanup on a copy |
| Keyboard clicks, chair bumps, or handling noise | Intermittent events | Mark each event; consider local editing when only a few occur |
| Hollow or distant voice | Strong room reflections or poor microphone distance | Expect a limited result; consider manual repair or re-recording |
| Harsh, flattened loud words | Possible clipping or source distortion | Return to the original; do not assume denoising can restore missing detail |
| Another voice over the main speaker | Overlapping speech | Do not treat the second voice as ordinary background noise |
| Noise changes whenever the speaker talks | Variable noise or prior processing | Compare complete phrases and listen for pumping or unnatural ambience |
Audacity's official Noise Reduction manual makes a useful general distinction: its conventional effect is intended for constant sounds such as hum, hiss, and fan noise, not individual clicks or irregular traffic. It also warns that loud or variable noise, or speech that is not much louder than the noise, can prevent a satisfactory result. Those statements describe Audacity's effect—not Noise Cleaner performance—but they show why you should identify the noise and set a realistic failure boundary before cleaning the file (Audacity Manual: Noise Reduction).
Define a Fair Test Before Processing
Before processing, create a simple test you can repeat. Use an intelligible passage that contains the unwanted sound during speech, plus a short pause that exposes the background on its own. This gives you a fairer test than listening only to the quietest part of the recording.
Choose a 12–20 second passage that includes a complete sentence, a short pause, and the unwanted sound. Record its start and end time. Compare that exact window in the original and processed files using the same playback device and a consistent volume position.
If one version is noticeably louder, adjust playback before choosing a winner and note the adjustment. Loudness alone can change preference, while the real question is whether the unwanted sound became less distracting without making the voice less intelligible or natural.
If your source is WAV, note basic metadata such as channel count and sample rate so you can identify the file later. Microsoft's RIFF documentation confirms that WAVE files use RIFF chunks, including a format header and a data chunk; it does not establish which file types Noise Cleaner accepts or exports (Microsoft Learn: Resource Interchange File Format).
Problems This Post-Recording Workflow May Address
This workflow is intended for a saved microphone file whose speech is still understandable and whose main problem is unwanted background sound. Potential candidates include steady computer-fan noise, mild room tone, low-level hiss, and mixed everyday noise that distracts from narration. If your main concern is preserving spoken detail in any saved voice file, start with the review-first voice-recording workflow. If a fan is the main problem, first separate steady wash from motor whine and direct airflow. For the broader method across audio and video recordings, use the general background-noise cleanup workflow.
Do not expect every microphone problem to respond to one method. A click may need a local edit; a plosive may need targeted repair; echo may need a different workflow; and clipped speech may be better handled by replacing the take. When typing is the main distraction, use the keyboard-noise guide to separate isolated clicks, repeated typing under words, and desk vibration before processing the whole track.
Because accepted inputs, outputs, file-size limits, and duration limits can change with the current account and media policy, check the current upload guidance instead of relying on a fixed list in an older article.
How to Clean the Saved Microphone Recording
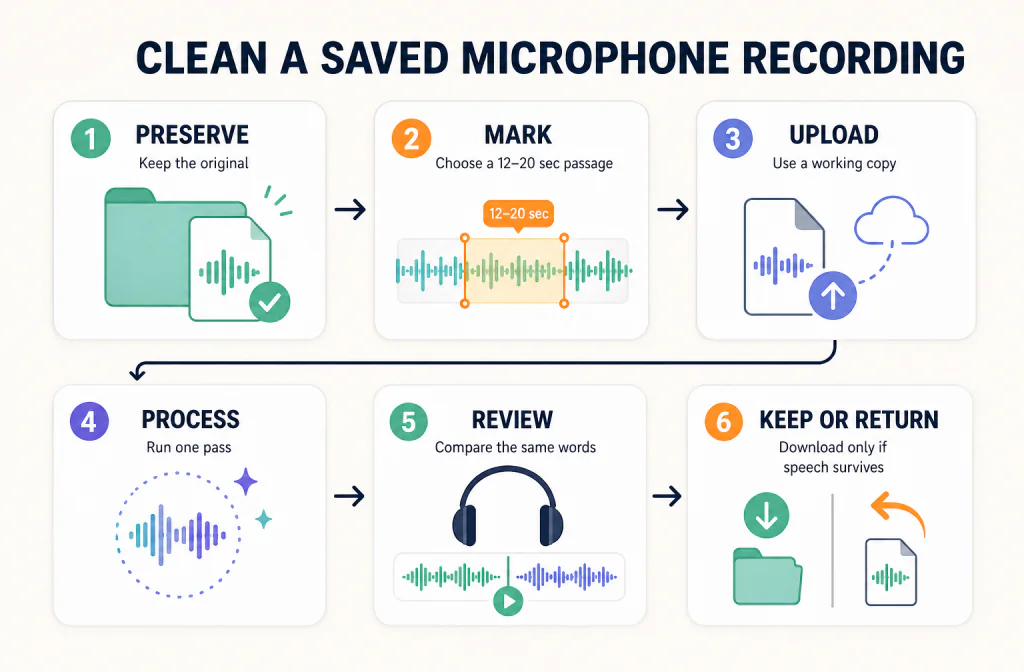
Preserve, diagnose, upload, process, compare, and download—without overwriting the source.
1. Preserve the source recording
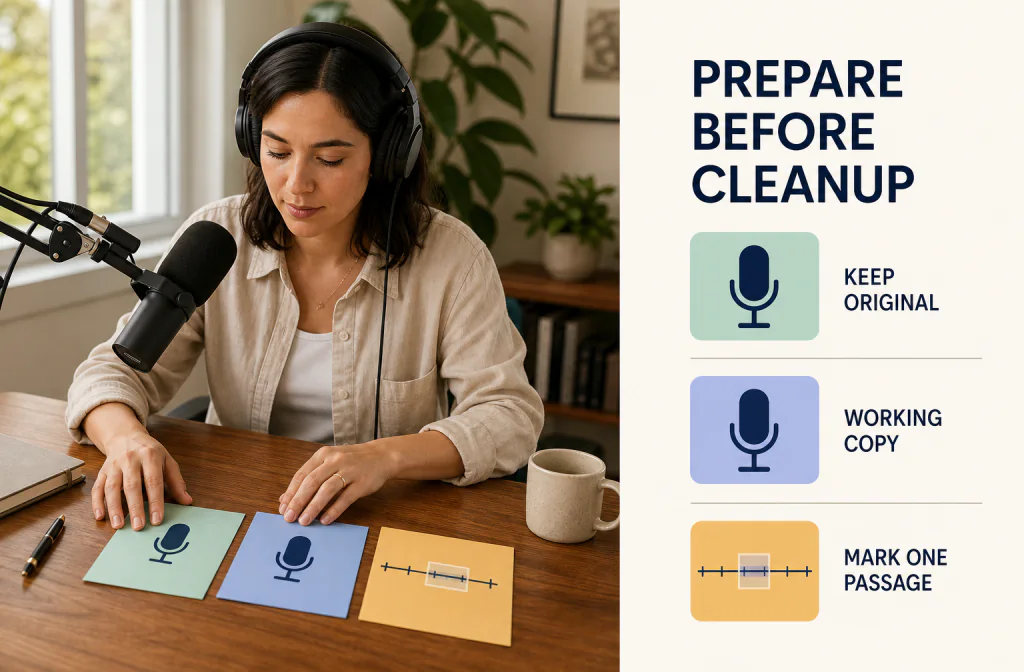
Duplicate the original and give the working copy a clear name, such as interview-raw-working-copy. Do not overwrite or repeatedly convert the only source. If cleanup introduces an artifact, the untouched recording is the only reliable way back. Use the recording preparation checklist when you need a more detailed source-file and listening setup.
Keep a short note with the source application, microphone, recording date when known, and any processing already applied. Unknown fields should remain unknown instead of being guessed.
2. Mark the passages you will review
Write down one representative passage and one difficult passage. The representative section should contain normal speech with the usual background sound. The difficult section should contain the strongest overlap or damage in the file.
This prevents a common review mistake: approving the entire recording from an easy pause or a single clean sentence.
3. Confirm that the current product accepts the working file
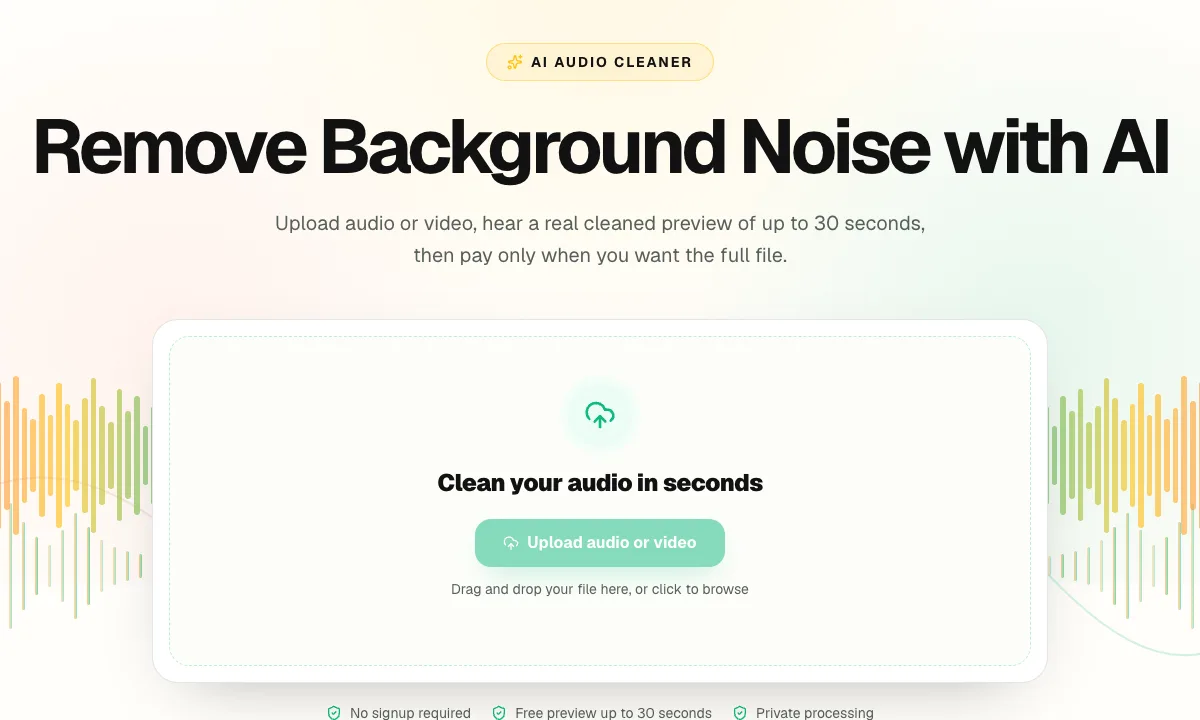
Open the microphone noise remover and upload the saved recording. Use only an input that the current interface accepts. If the upload fails, check the current guidance or return to the source application for a deliberate export; do not make a chain of random conversions.
4. Run one cleanup pass
Follow only the controls and states that appear in the current product. One pass is enough for the first comparison. Processing an already processed output again makes it harder to identify where speech damage began.

5. Preview the same words before and after
Return to the timestamps you recorded. First listen for the target noise. Then listen again for word beginnings, word endings, soft consonants, breaths, tonal changes, and ambience that rises and falls unnaturally.
Ask two separate questions:
- Is the unwanted sound less distracting?
- Is the speech at least as complete, intelligible, and natural as before?
The result is useful only when the answer to both is acceptable for the project. Residual noise can be safer than missing speech or metallic artifacts.
6. Download and check the file independently
If the preview passes, download the cleaned file and open it outside the browser. Check the start, both marked passages, and the end. Confirm the actual output and playback behavior from the file you received; do not infer them from the source extension.
Keep the original and cleaned versions under distinct names. If the result is worse, reject it and return to the original rather than cleaning the processed output again.
Hear a Real Microphone Recording Before and After Cleanup
The following pair uses the same 30.38-second indoor podcast recording. The original and cleaned files are both stereo, 48 kHz M4A audio, and the full clip is presented in both players. The source was supplied for this Noise Cleaner example and processed with the registered FullSubNetPlus-b115416 model build. File durations and hashes were rechecked on August 15, 2026.
Original indoor podcast recording
Cleaned indoor podcast recording
Editorial observation: In this sample, the indoor background is less prominent in the cleaned version, while some natural room character remains. That does not guarantee the same result for another microphone, room, voice, or noise pattern. Listen to the speech texture as carefully as the background, and reject the result if consonants, breaths, or word endings become less natural.
Use the full keep-or-return listening checklist to review this pair in separate passes for word clarity, noise, voice tone, ambience, and the downloaded file.
You can compare this audio example and the separate outdoor video example on the Noise Cleaner Before-and-After showcase.
How to Judge the Cleaned Result
Use a keep, retry, repair, or re-record decision rather than assuming every processed file should be published.
| Result | Decision |
|---|---|
| Noise is less distracting and speech remains natural | Keep the download after a full-file check |
| Some noise remains but every word is intact | Decide whether the residual sound is acceptable |
| The voice sounds metallic, watery, hollow, or unstable | Return to the original and choose a manual path |
| A few isolated clicks remain | Repair those moments locally if possible |
| Important consonants or words disappear | Reject the processed version |
| The source is clipped, severely distorted, or masked by another speaker | Re-record or seek specialist repair when the material matters |
Audacity's manual advises using the lowest reduction that reaches an acceptable noise level because stronger settings can damage remaining audio. Again, that is guidance for Audacity's effect, not a tested Noise Cleaner setting. The transferable editorial lesson is to judge speech preservation and residual noise together, then document the tradeoff (Audacity Manual: Noise Reduction).
Audio and Video Workflows Are Not Interchangeable
This guide focuses on a saved microphone audio recording. If the microphone track came from a video project, keep its original start time and duration. When you export dialogue for separate cleanup, reimport the cleaned track at the same timeline position and check sync at the beginning, middle, and end.
This article also does not cover live microphone filtering. A real-time filter changes audio during capture or a call; Noise Cleaner processes files after recording.
For a live Discord voice conversation, use the Discord Krisp setup and listening-check guide instead of treating a saved-file upload as a call filter.
For an Apple live call, the FaceTime Voice Isolation guide explains how to compare supported Mic Modes without implying that FaceTime created a saved recording.
Limitations and Safer Alternatives
Post-recording cleanup is not reconstruction. The safest next action depends on what is wrong with the source.
- Clipping or severe distortion: Return to the original take. If important words are damaged, replace or re-record them when possible.
- Noise overlapping quiet speech: Stronger removal may also change the voice. Compare full words, not just silent gaps.
- Intermittent clicks and handling sounds: A local editor may be more precise than processing the whole file.
- Strong room reflections: Noise cleanup and de-reverberation are different tasks. Do not expect a hollow, distant voice to become close-miked speech.
- Overlapping speakers: General cleanup is not speaker separation.
- Music under speech: General cleanup should not be treated as reliable music isolation.
- Irreplaceable material: Preserve multiple copies and consider a specialist who can make targeted repairs.
Prevention still matters for the next recording. Shure's podcast-recording guide recommends a quiet, soft-furnished space, a short test recording, monitoring with headphones, conservative levels, and avoiding clipping. Its microphone-distance advice is product and scenario dependent, so treat it as a starting point rather than a universal number (Shure: How to Start a Podcast—Recording an Episode).
Where the Workflow Fits
Voiceovers and tutorials
Test a complete sentence with breaths and soft consonants. Keep the natural performance more important than a perfectly silent background.
Podcast or interview tracks
If separate microphone tracks exist, preserve and review them separately. One participant's clean result does not establish that the same processing fits every voice.
Lessons and screen recordings
Check quiet explanations as well as normal narration. If keyboard clicks happen only at a few moments, local repair may be more appropriate than aggressive full-track processing.
Meeting recordings
This is a post-meeting workflow for a saved file, not a live-call solution. Review every speaker; a quiet participant may have a different failure boundary from the main presenter.
Frequently Asked Questions
Can Noise Cleaner clean a microphone live?
No. The workflow begins with a saved upload and ends with a preview and download. Use a real-time filter when you need noise control during capture or a live call.
Which microphone file formats can I upload?
Use a format listed in the current upload interface or product guidance. Acceptance also depends on the account's byte limit and the media policy returned by the service, so a file extension alone does not guarantee acceptance.
Should I convert the recording before cleanup?
Not by default. Preserve the original and avoid unnecessary conversions. Convert only when the current product requires a supported input and you can document the source and export path.
Can cleanup fix clipping?
Do not assume so. Clipping damages the wanted signal, while background-noise reduction targets unwanted sound. Return to the original, replace a phrase from another take, use specialist restoration, or re-record when possible.
What if the cleaned voice sounds metallic?
Reject that output, return to the untouched source, and compare a safer alternative. Do not stack another cleanup pass onto the damaged file.
Is a quieter result always better?
No. A useful result also needs intelligible, complete, and natural-enough speech. Compare the same passage at a consistent listening level and note any remaining noise or artifacts.
Sources and Test Notes
- Shure — How to Start a Podcast: Recording an Episode (published March 14, 2023; accessed August 15, 2026). Supports the prevention guidance on room choice, test recording, monitoring, conservative levels, and clipping avoidance. It does not verify Noise Cleaner behavior.
- Audacity Manual — Noise Reduction (accessed August 15, 2026). Supports the distinction between steady and irregular noise and the general risk that aggressive reduction can damage wanted audio. It describes Audacity, not Noise Cleaner.
- Microsoft Learn — Resource Interchange File Format (RIFF) (last updated January 7, 2021; accessed August 15, 2026). Supports the narrow explanation of WAVE/RIFF structure; it does not establish product compatibility.
- The Before-and-After players use the same user-supplied indoor podcast source and the registered Noise Cleaner model build. The two public files are 30.38 seconds long, stereo, and 48 kHz. No percentage-reduction, quality-score, or universal performance claim is made.
Decision and Next Action
Choose AI cleanup when the saved microphone recording is still intelligible and background noise is the main distraction. Choose local editing for isolated events, specialist repair for valuable damaged material, or re-recording when the take is repeatable and the source is severely compromised.
Clean the saved microphone recording with Noise Cleaner, then compare the same passage and keep the download only if the voice remains acceptable.