Prepare a Recording for AI Noise Reduction: File and Listening Checklist
Prepare audio for noise reduction without overwriting the source. Follow a practical file, listening, comparison, and cleanup checklist before upload.
Quick Answer
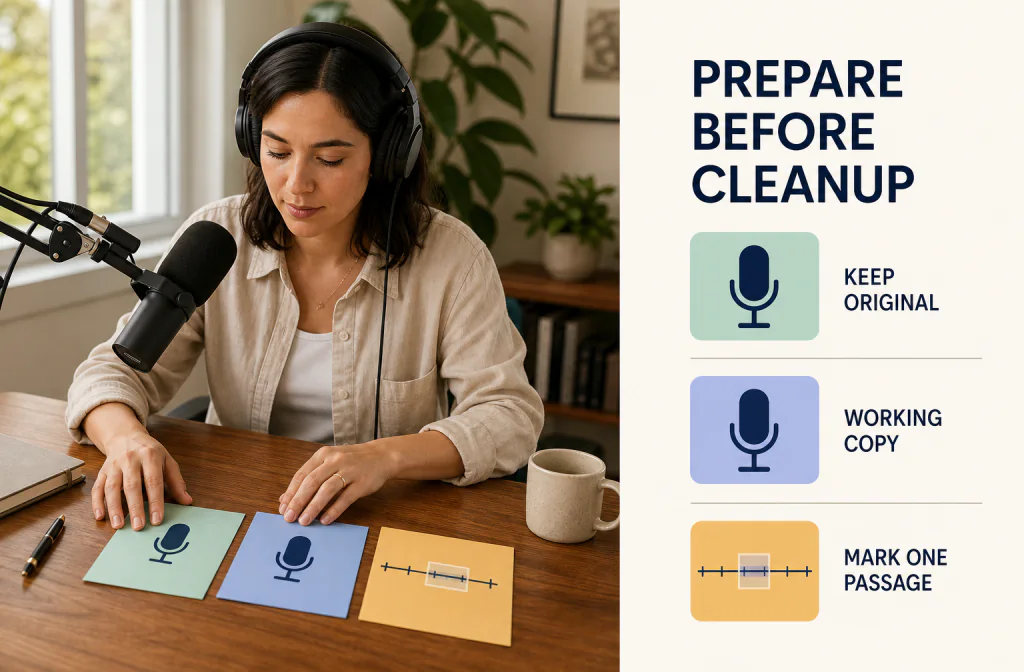
Before using AI noise reduction, keep the original recording untouched, choose the version closest to the original capture, and create one clearly named working copy. Mark a short passage that contains normal speech, the unwanted sound, and a brief pause. Listen to that exact passage on the same device and at a consistent volume before and after processing. Noise Cleaner fits the next step when you have a saved recording to upload, preview, compare, and download. It does not replace source-file management, and it cannot reliably recreate words that were clipped, masked, or never captured clearly. The biggest preparation mistake is processing the only copy or starting from an already compressed or denoised export when a better source still exists.
Preserve first, inspect second, process third. Never make the only copy of a recording your cleanup test.
Why Preparation Matters Before Noise Reduction
Noise reduction can only work with the signal contained in the file you provide. If that file has already been trimmed, converted repeatedly, normalized aggressively, or processed by another denoiser, it becomes harder to tell which step caused a new artifact.
A preparation routine gives you two things: a recovery path and a trustworthy baseline. The untouched original lets you restart. The baseline tells you what the actual problem sounds like, where it is most obvious, and which words must remain intact.
If the working file is part of a Live Set, use the Ableton Live background-noise workflow to preserve the Set, test Gate on a duplicate track, and export a separate review copy.
Without that baseline, a louder or quieter output can feel improved even when the voice has become thin, metallic, or less intelligible. You do not need an advanced studio setup to avoid that mistake. You need an original, a working copy, a fixed comparison passage, and simple notes about what you hear.
When you are ready to move from preparation into processing, follow the complete recording cleanup workflow.
For a saved voice memo, interview, lesson, or narration, use the voice-recording cleanup and review workflow to compare the same words and choose whether to keep, repair, or re-record.
If the source is a saved desk, podcast, lesson, or interview microphone track, continue with the post-capture microphone cleanup workflow for a mic-specific diagnosis and Before-and-After review.
Source-File Checklist
Keep the original untouched
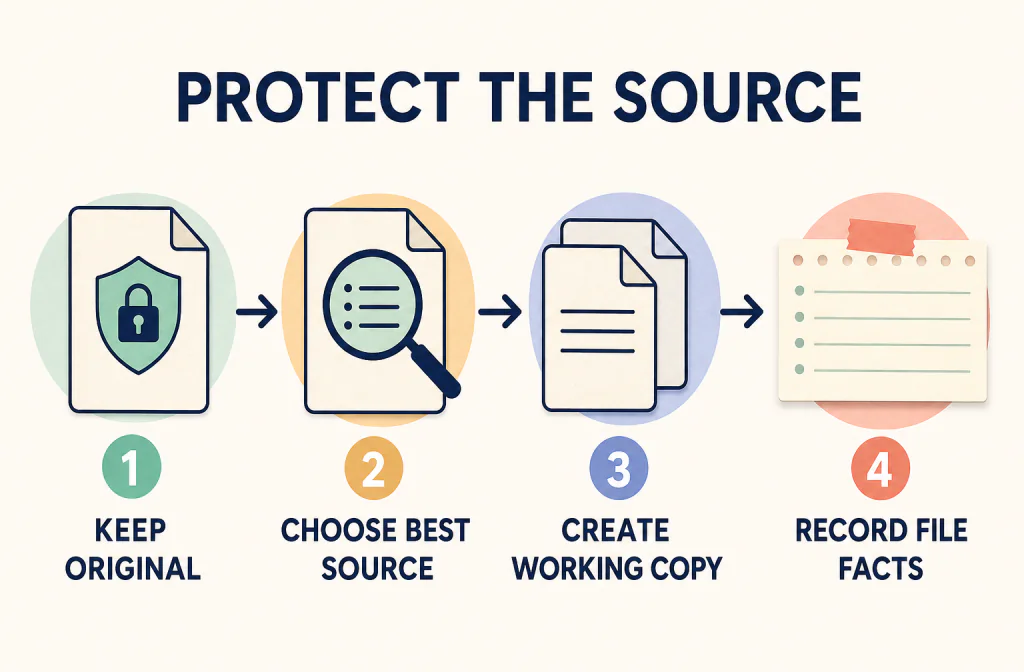
Store the first captured or exported file under a name that clearly identifies it as the original. Do not trim, normalize, denoise, or overwrite it. If the recording is valuable, keep a second backup in another location before experimenting.
Keep the original recording, working copy, cleaned output, and review notes in separate folders. The exact folder names are optional; the separation is what protects you from replacing the source with a result you later reject.
Choose the closest available source
Prefer the file closest to the original recording. If you still have the recorder, camera, phone, meeting-platform, or editor export, use that instead of a version downloaded from a social platform, messaging app, or shared preview.
Do not assume that one file type is always best. The useful questions are:
- Is this the complete recording?
- Has it already been cleaned, levelled, compressed, or converted?
- Does it contain the correct speaker or dialogue track?
- Can the current cleanup workflow accept it without an unnecessary conversion?
If you have several candidates, keep them all and write down where each one came from before choosing the working source.
If the best available source is MP3, use the MP3 cleanup and verification guide to avoid unnecessary re-encoding and to check the actual downloaded file in the next application.
Create one working copy
Duplicate the source and add a suffix such as -cleanup-test-01. Run the first cleanup pass on that copy. If you test another method later, create -cleanup-test-02 from the untouched original rather than processing the first result again.
This prevents stacked processing. It also gives every output a clear parent, so you can compare methods without wondering which file was processed twice.
Record basic file facts
Write down only what you can verify:
- source application or device;
- exact duration;
- filename and extension;
- file size;
- number of speakers;
- audio-only or video;
- known editing or cleanup already applied;
- the main noise or quality problem.
When the source is WAV, the extension is still only one piece of the record. Microsoft's RIFF overview describes RIFF files as collections of chunks that include format and audio-data information. That technical structure does not prove that a particular cleanup product accepts the file, and it does not reveal the file's processing history. A real upload and output check is still required.
Listening Checklist
Listen to three moments
Start with three parts of the recording:
- A quiet pause, where the background sound is easy to identify.
- A normal sentence with noise under the voice, where speech preservation matters most.
- The hardest moment, such as traffic, a keyboard impact, a loud fan, wind, clipping, or a quiet word covered by noise.
The normal sentence is the most important. Noise reduction that sounds impressive only during silence does not tell you whether speech remains natural.
When a fan is the main sound, use the fan-noise guide to tell steady wash from a high motor whine, direct airflow, or electrical hum before choosing the test passage.
Mark one comparison passage
Choose a passage of roughly 12–15 seconds that contains complete words, the target noise, and a short pause. Record its start and end times. Use that identical window for every original and processed comparison.
Do not choose a new, easier passage after hearing the result. A fixed window prevents the comparison from drifting toward whichever section makes the processing look best.
Keep playback consistent
Compare on the same device, in the same player, and at a similar listening level. Headphones can expose chirping, pumping, metallic sound, altered breaths, or watery consonants. Phone or laptop speakers can show whether ordinary listeners still understand the words.
If one version is noticeably louder, adjust the playback presentation before deciding that it sounds better. When a published review includes programme loudness or true-peak values, it should use a documented measurement method such as ITU-R BS.1770-5. A number still does not replace listening for intelligibility and naturalness.
Mark existing damage before processing
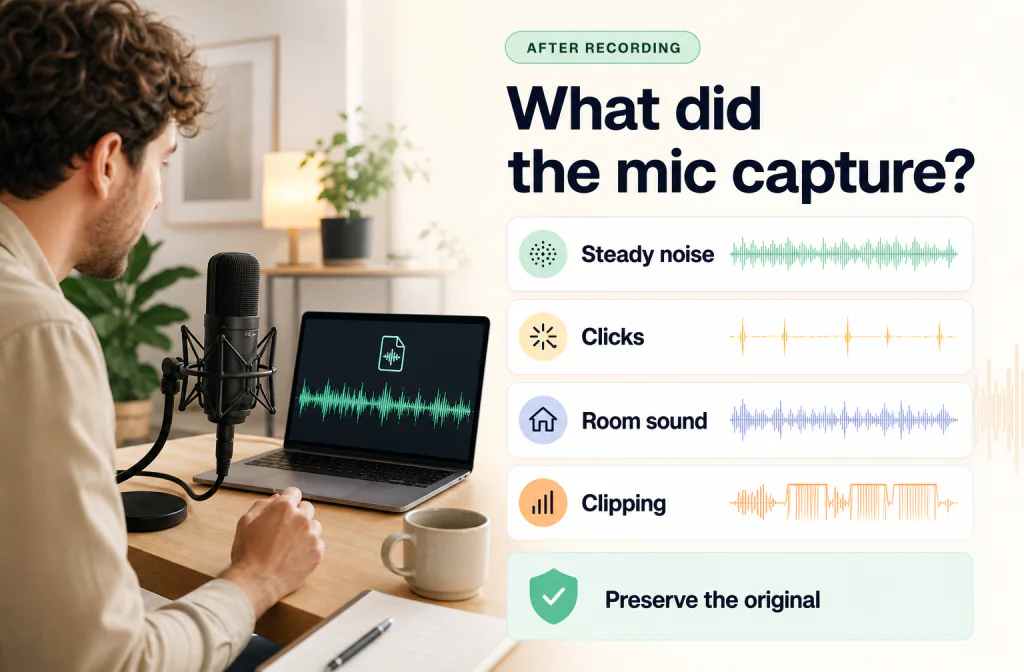
Write down words that are already unclear, clipped peaks, crackling, strong room echo, and moments where noise overlaps speech. This separates source damage from changes introduced by processing.
If a word is already missing or unintelligible, set a limited goal: reduce distraction without pretending the original information can be reconstructed reliably.
Problems to Flag Before Upload
| What you hear | Why it matters | Preparation decision |
|---|---|---|
| Steady, low-level fan or room noise | A consistent background can be easier to test than changing events | Keep a pause and a sentence with noise under speech |
| Traffic, wind, impacts, or changing crowd noise | The sound changes and may cover individual words | Mark every important overlap and expect a partial result |
| Clipped, flattened, or crackling speech | The wanted signal is already damaged | Preserve the source; consider specialist repair or re-recording |
| Strong echo or very distant speech | The problem includes room reflections and poor capture, not only a background layer | Use a limited goal and review speech carefully |
| Multiple people talking at once | General cleanup is not speaker separation | Do not label another speaker as ordinary background noise |
| Metallic or watery sound before the test | A previous process may already have removed voice detail | Return to an earlier source if one exists |
The Audacity Noise Reduction manual documents its effect as useful for constant sounds such as hum, hiss, or fan noise and less suitable for individual clicks, traffic, or other irregular sound. It also warns that loud, variable, or speech-overlapping noise can be difficult to remove satisfactorily. That guidance describes Audacity's method, not a Noise Cleaner result, but it supports the practical decision to identify the noise before choosing a process.
Prepare the File for Noise Cleaner
Confirm the current input path
Open the current Noise Cleaner experience and inspect what it actually accepts. Do not rely on an old article or assume that an extension, duration, file size, output type, or batch feature is supported. The current interface and a successful test are the evidence.
If the best source is not accepted, keep it untouched. Make a documented conversion copy only when the workflow requires one, then record the source and conversion so the new file is not mistaken for the original.
Upload the working copy
Choose the prepared copy, not the file stored in the original folder. Check the filename one more time before starting. If the upload fails, save the visible error or state and diagnose it; do not keep converting the only source until something happens to work.
Use only the controls you can see
Run the cleanup action available in the current interface. If the product does not show a noise type, strength control, quality score, or advanced analysis, do not invent one for your notes or workflow.
Record the actual steps you took. That record is more useful than a generic instruction because it lets you repeat the test after a product update.
Preview the marked passage
Return to the fixed 12–15 second window. Ask two separate questions:
- Is the unwanted sound less distracting?
- Is the voice at least as understandable and natural as before?
Listen to consonants, word endings, breaths, and room tone. A quieter background is not a useful trade if it removes meaning from speech.
Download into the output folder
Save the result outside the original and working-copy folders. Open it independently, then check the beginning, marked passage, and end. Record the actual output you received instead of assuming its format or behavior from the filename alone.
Keep the result only when it is more useful than the source for the next editing or publishing step.
How to Compare One Prepared Test
Preparation does not improve the recording by itself. Its value is that it makes the processing result easier to trust.
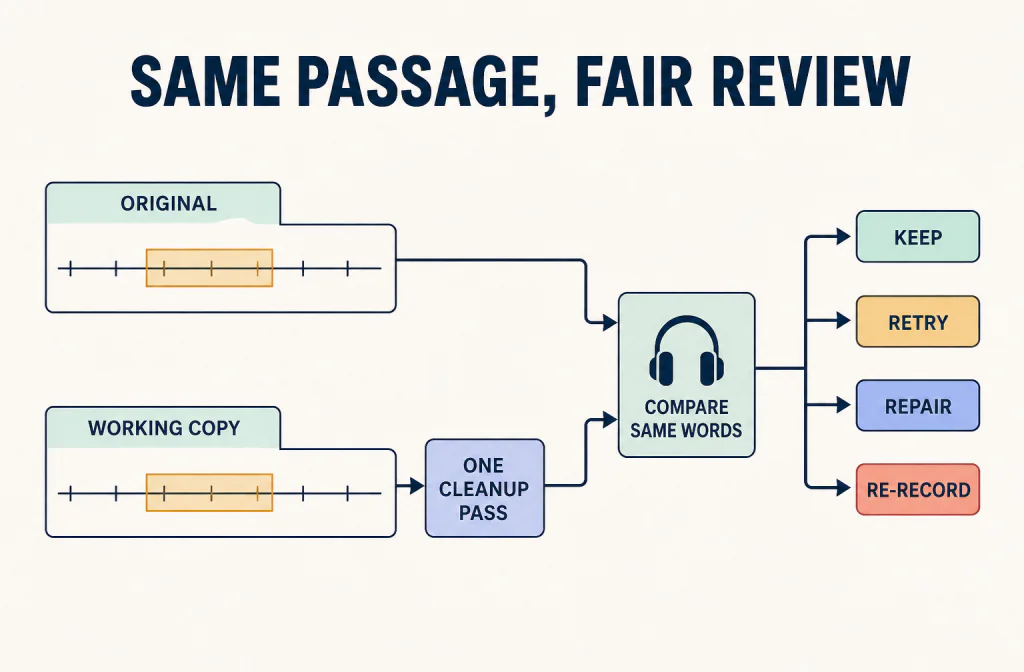
Use the same source passage, timestamps, and spoken words for both versions. Keep player controls and playback presentation consistent. Review the unwanted sound and the voice separately, then write a short decision:
For the complete listening sequence, follow the fair same-passage comparison guide before you keep or reject the processed file.
- Keep: The noise is less distracting and the voice remains natural.
- Retry from the original: The result helps, but some words or breaths sound processed.
- Use manual repair: The problem affects a few isolated moments better handled individually.
- Re-record: Important speech is clipped, masked, missing, or repeatable more easily than it can be repaired.
Never run the second test on the first cleaned output. Return to the untouched source so every comparison starts from the same recording.
Audio and Video Need Different Preparation
For audio, keep the original file and note how it will return to the editor or publishing workflow after cleanup.
For video, also preserve the original container and editing project. A direct-video workflow should be described only after the current product has been tested for input, output, duration, and sync behavior.
If the verified route uses exported dialogue instead, preserve the audio's start position and duration. Process a copy, replace it at the same timeline position, and check sync at the beginning, middle, and end. Do not shift the cleaned track simply because the first sentence looks aligned.
Common Preparation Mistakes
Overwriting the source
Stop and restore from a backup before continuing. Without an original, you lose the safest way to reject a damaged result.
Processing an already processed output
Stacked cleanup can exaggerate artifacts and hide where they began. Create every new test from the untouched source.
Comparing different passages
Different words and noise events cannot show what one process changed. Use one fixed time window.
Judging only a quiet gap
A silent passage can reveal background sound, but it says little about speech preservation. Include noise under words.
Making the file louder before listening
Level changes introduce another variable. Keep the source untouched and document any playback adjustment used only for comparison.
Assuming the extension proves compatibility
An extension does not establish the full media structure, processing history, or current product support. Confirm the real input and output.
Preparation by Creator Workflow
Podcast interview
Preserve separate speaker tracks when they exist. Mark a passage from each speaker because microphone level, room sound, and background noise may differ. Do not approve a full episode from the easiest voice alone.
YouTube or talking-head video
Preserve the camera original and project. Mark a section with visible speech so you can check lip sync as well as sound quality after processing.
Course or screen recording
Test one representative lesson before applying the workflow across a course. Include quiet explanation, normal narration, and any keyboard or fan noise that appears during speech.
These scenarios use the same preservation rule, but their final checks differ. The podcast needs speaker consistency, the video needs sync, and the course needs consistency across lessons.
Limitations and Better Alternatives
Preparation cannot restore information that was never captured. It also cannot turn overlapping speakers into separate tracks, remove heavy clipping reliably, or guarantee that strong echo and noise will disappear without affecting the voice.
Choose another path when it is safer:
- Re-record a short, repeatable take with missing or badly distorted words.
- Replace a phrase from another take when only one sentence is damaged.
- Use manual editing for isolated clicks, impacts, or a few local problems.
- Use specialist restoration for valuable, irreplaceable material with complex damage.
- Accept some natural ambience when stronger processing harms speech more than the remaining noise does.
The correct goal is not silence at any cost. It is a result that remains understandable, natural, and useful for the project.
Frequently Asked Questions
Should I trim the recording before noise reduction?
Keep the full original. You may create a short test copy for a quick evaluation, but do not replace the only source or remove context needed for the final edit.
Should I normalize or make the file louder first?
Not automatically. A level change adds another variable. Preserve the original and document any playback-only adjustment used to make the comparison fair.
Is WAV always the best input?
No universal recommendation applies to every workflow. Use the closest available source that the current product accepts, and avoid unnecessary conversion.
How long should the comparison passage be?
About 12–15 seconds is practical for a focused review when it includes complete speech, the target noise, and a short pause. Using the identical passage in both versions matters more than the exact length.
Can I prepare a meeting or podcast the same way?
Yes at the file-management level: preserve the original, create a copy, mark a passage, and document the speakers. Review each speaker separately when levels or noise differ.
What if important words are already unclear?
Mark them before processing. Cleanup may reduce distraction, but it should not be presented as a reliable way to reconstruct speech information that the source did not capture clearly.
Sources and Test Notes
- Audacity Manual: Noise Reduction — supports the bounded explanation of constant versus irregular or speech-overlapping noise and the risk of damaging desired audio with aggressive reduction. It does not establish Noise Cleaner performance.
- ITU-R BS.1770-5 — defines a method for measuring programme loudness and true-peak audio level when numeric measurements are reported; listening is still needed to judge naturalness and intelligibility.
- Microsoft Learn: Resource Interchange File Format — supports the limited explanation that RIFF is a chunk-based format used in WAV files; it does not prove product compatibility.
Final Checklist and Next Action
Your recording is prepared when you have an untouched original, a clearly named working copy, verified basic file facts, one fixed speech-under-noise passage, consistent playback, and notes about existing damage.
Upload only the working copy. Run one real cleanup pass, compare the same passage, and keep the output only when the unwanted sound is less distracting without making the voice less clear or natural. If important words are already missing, choose manual repair, replacement, or re-recording instead of forcing a stronger cleanup.
Ready with a protected working copy? Upload the prepared recording to Noise Cleaner.